Installation must be carried out by a licensed/registered plumber in your state or territory: VBA (VIC) · NSW Fair Trading · QBCC (QLD) · CBS (SA) · WA Plumbers Licensing Board · Tasmania Building Standards & Occupational Licensing · Access Canberra (ACT). DIY install may breach state plumbing regulations and the manufacturer warranty will not apply.
Australian Consumer Law: Our goods come with guarantees that cannot be excluded under the Australian Consumer Law. You are entitled to a replacement or refund for a major failure and compensation for any other reasonably foreseeable loss or damage. You are also entitled to have the goods repaired or replaced if the goods fail to be of acceptable quality and the failure does not amount to a major failure.
Comply with: AS 3740:2021 (Waterproofing of domestic wet areas) · AS/NZS 3500.2:2021 (Sanitary plumbing & drainage) · AS/NZS 3500.4 (Heated water services) · AS 3566 (Corrosion-resistant fasteners) · NCC 2022 Volume 2 §3.8.1 + Volume 3 (Plumbing Code of Australia).
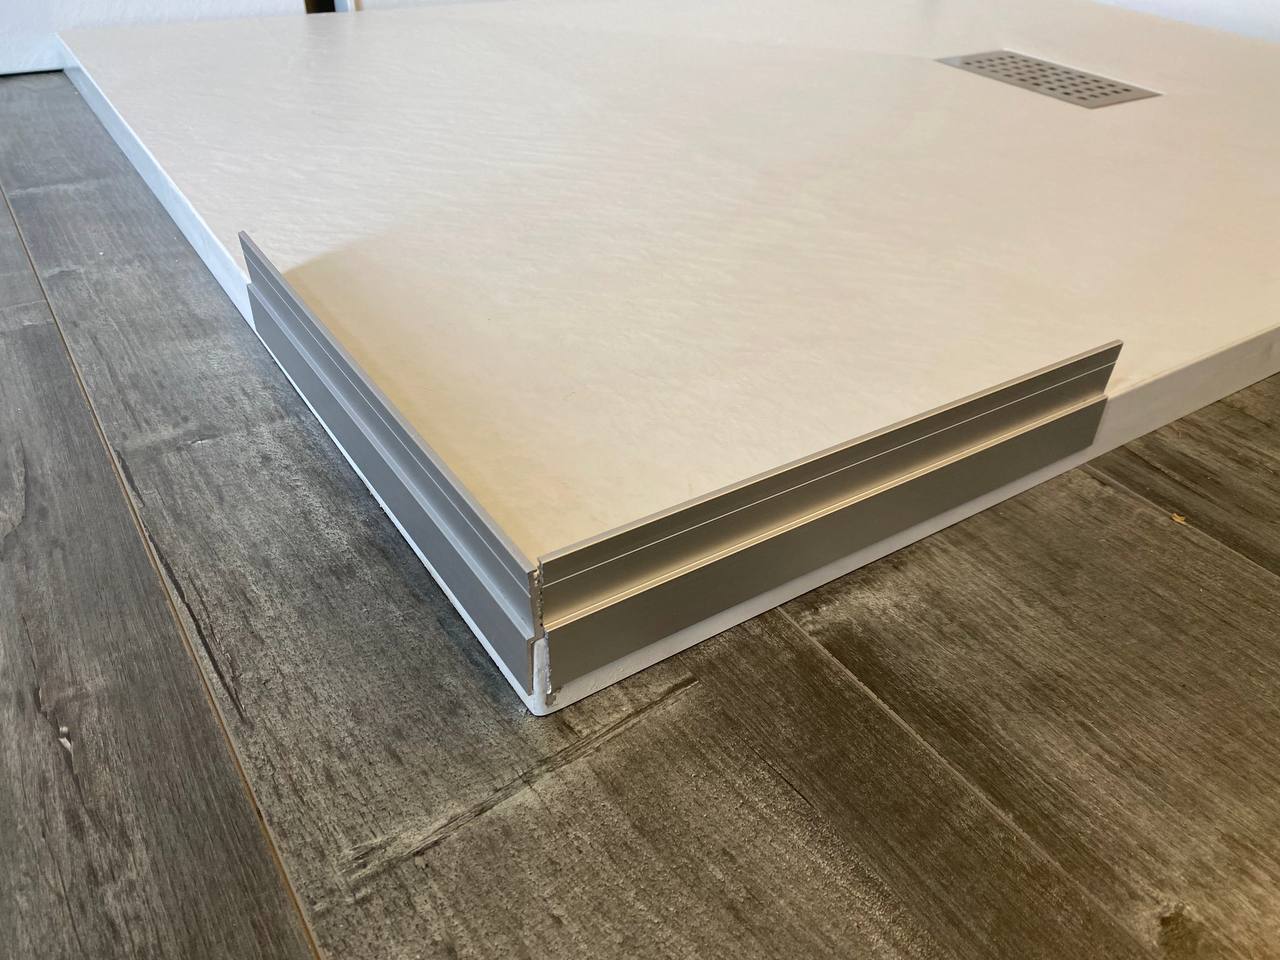
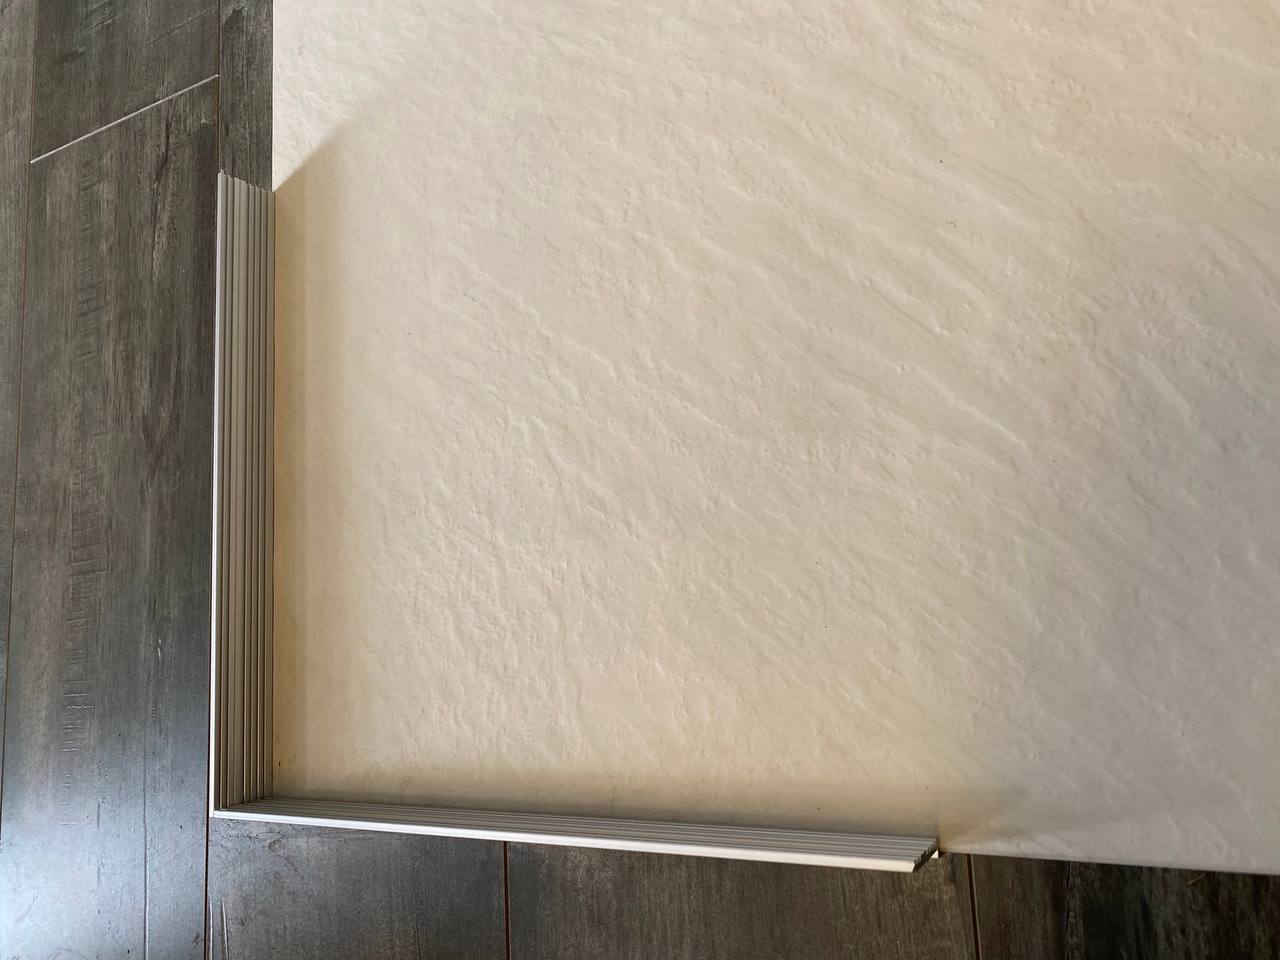
This guide covers GT Series Slate SMC bases: GT-10090CC, GT-12090CC, GT-12090CCB, GT-15090CC, GT-15090CCB, GT-18090CC, GT-18090CCB, GT-20090CC. Slate bases have the same SMC core as the standard GT series but require aluminium flashing on the edges that butt against walls.
| Acclimatise | Stand the base in the bathroom for ≥ 24 hours at 10–35 °C before install. |
| Substrate | Floorboards or sheet flooring must cover the entire underside of the base. Cut hole for waste ≤ 200 × 200 mm (≤ 300 × 300 mm on concrete). For renovations, inspect floorboards for rot or water damage — replace if soft, springy, or mouldy. Top edge of base must finish 2–5 mm above adjacent finished bathroom floor; pack with fibre-cement sheet if required. |
| Tools & materials | 12 mm notched trowel · cement-based tile adhesive or flexible construction silicone · polyurethane sealant (waterproofing-grade, non-solvent) · flexible silicone sealant (mould-resistant, neutral cure) · Class 3 wafer-head needle-point screws · spirit level · tape · pencil · marker · hole saw · drill with 3 mm bit for flashing. PPE: safety glasses, gloves, dust mask (cutting tiles generates respirable crystalline silica — comply with state silica code). |
| WHS | Two-person lift (slate bases weigh 18–28 kg). Crystalline silica: NSW/QLD/SA/WA/TAS/ACT codes apply when cutting tiles or drilling masonry. |
For villa board / fibre-cement lining, check the base into the framework a minimum of 3 mm. For water-resistant plaster board, place the base against the framing and run the lining down onto the tile flange. Mark the waste position on the substrate and cut the waste hole. Top edge of base to finish 2–5 mm above the finished bathroom floor.
Apply silicone or full-bed cement-based tile adhesive (12 mm notched trowel) over the entire underside. Lower base onto substrate. Check level both ways — the base has a factory fall to waste (gradient ≥ 1:80 toward the outlet). Use the adhesive bed to compensate out-of-level floors so the base is fully supported with no voids.
Where the base is installed against a wall, fit the supplied aluminium flashing on the edge. Flashing to extend 50 mm past the base along each wall. Pre-drill flashing at 150 mm centres, starting 70 mm from the outer edge with a 3 mm bit. Apply a continuous bead of polyurethane sealant between flashing and base. Fix with Class 3 wafer-head needle-point screws — 1 screw per 150 mm, 20 mm from each end. Flashing extends behind the wall sheeting.
Insert the floor waste through the waste hole. Apply silicone between the waste flange and the shower base. Ensure the rubber sealing washer is fitted under the base. Hand-tighten the locking ring only — do not over-tighten. Connect trap and sanitary plumbing per AS/NZS 3500.2. Flood test BEFORE lining walls: plug the waste, fill base to 25 mm above the tile flange, hold for 30 minutes. No leaks, no movement, drains fully when unplugged.
Fix water-resistant plaster board or villa board over the tile flange (aluminium flashing sits behind the lining on wall edges). Seal all joints between base and lining with flexible silicone sealant. Apply waterproofing membrane per AS 3740:2021 — full shower area, bond-breaker tape at wall/floor junctions, ≥ 1:80 fall-to-waste gradient maintained. Fit tempering valve on heated water per AS/NZS 3500.4.
The slate surface is textured. Clean with a soft brush using warm soapy water or a mild household detergent. Avoid abrasive cleaners, scourers, solvents and acids — these damage the slate surface profile. Polish with a silicone-based polish to restore lustre after light surface marks.
Australian Polymore Slate SMC shower bases are warranted for five (5) years from the date of purchase against faulty materials or workmanship under normal domestic use. The warranty does not apply to defects caused by incorrect installation, water temperatures above 55 °C, impact damage, modifications, commercial use, or failure to follow these instructions.
This warranty is in addition to the rights and remedies you have under the Australian Consumer Law (Competition and Consumer Act 2010 (Cth), Schedule 2). The guarantees under the ACL cannot be excluded. Nothing in this warranty affects those rights.
To make a claim, lodge online at polymore.com.au/page-8/warranty-claim.html or email sales@polymore.com.au.